Tutorial: Automating Personalized Marketing Emails with n8n and LangChain
In this tutorial, we will use n8n to create an automated workflow that personalizes marketing emails based on customer purchase history. This workflow will generate and send emails, and for dissatisfied customers, it will offer a coupon code to try and convert them into happy customers.
Let's get started!
Step 1: Setup and Download Dummy Data
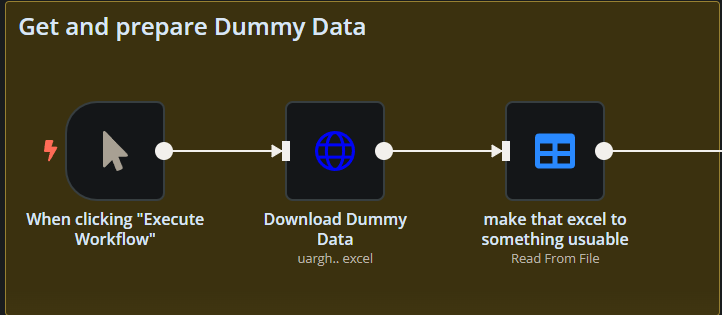
Node: Manual Trigger
First, we will set up a manual trigger to start our workflow when we click "Execute Workflow."
Node: HTTP Request
We will download dummy data from a given URL. This dummy data will represent the customer purchase history and feedback.
URL: https://let-the-work-flow.com/dummy/n8n-contest-merch.xlsxNode: Spreadsheet File
This data will be processed into a usable format for our workflow.
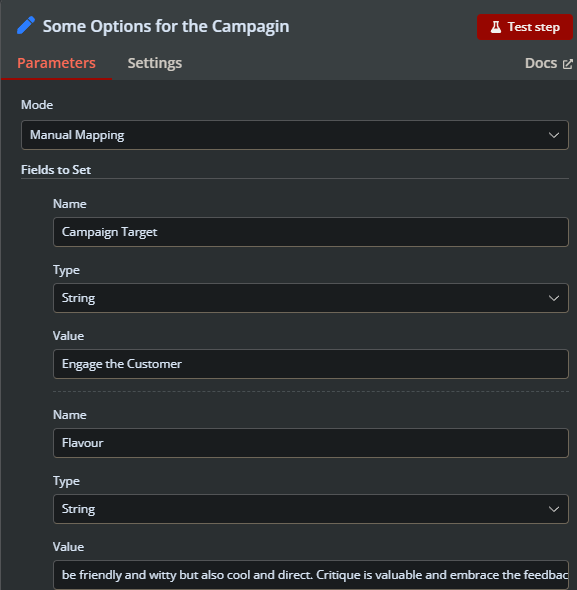
Step 2: Configure Campaign Options
Node: Set
We will create a set node to define some basic parameters for our campaign, like the target audience and the tone of the emails.
Step 3: Integrate LangChain for Email Generation
Node: OpenAI Chat Model

Using OpenAI's GPT-4o model, we will generate email content based on customer feedback. This model will also decide if a coupon needs to be sent to the customer.
Node: Basic LLM Chain
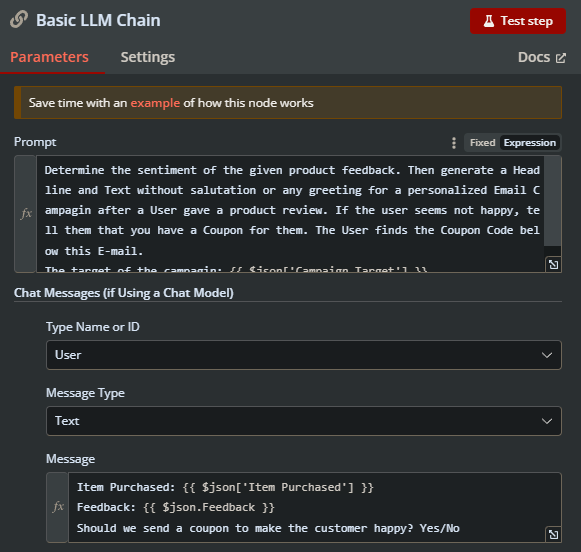
Incorporate LangChain to connect with GPT-4o and define the prompt for generating content. The prompt will ask the AI to analyze feedback and decide the content of the email, including the headline and body.
Prompt: Determine the sentiment of the given product feedback. Then generate a Headline and Text without salutation or any greeting for a personalized Email Campaign after a User gave a product review. If the user seems not happy, tell them that you have a Coupon for them. The User finds the Coupon Code below this E-mail.Node: Structured Output Parser
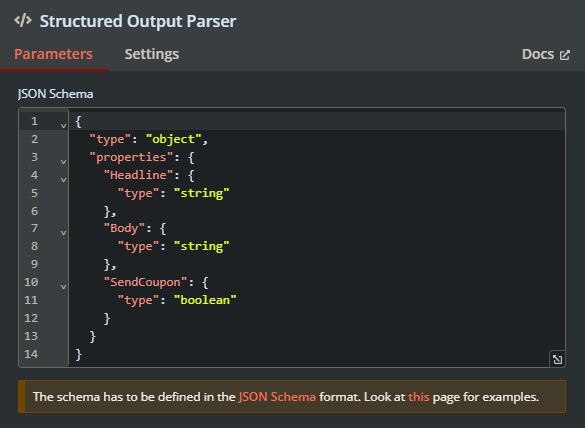
This node will parse the output from GPT-4o, structuring it into a straightforward JSON format that we can use in subsequent steps.
Step 4: Validate and Combine Data
Node: Merge
Combine the AI-generated content with the existing customer data to ensure we have all necessary fields.
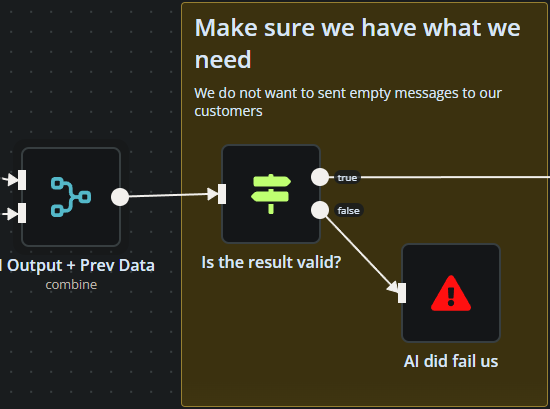
Node: If
Check if the critical elements like the headline and email body are present. If any element is missing, the workflow will log an error and halt.
Step 5: Handle Coupon Logic
Node: If
Decide if we need to include a coupon based on whether the AI determined the customer was unhappy.
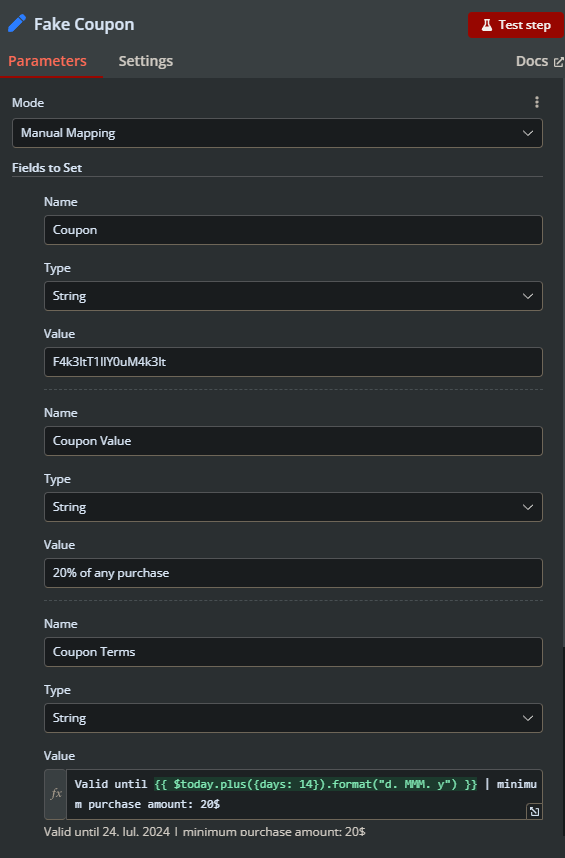
Node: Set (Fake Coupon)
For demo purposes, we will generate a fake coupon code.
Step 6: HTML Email Templates
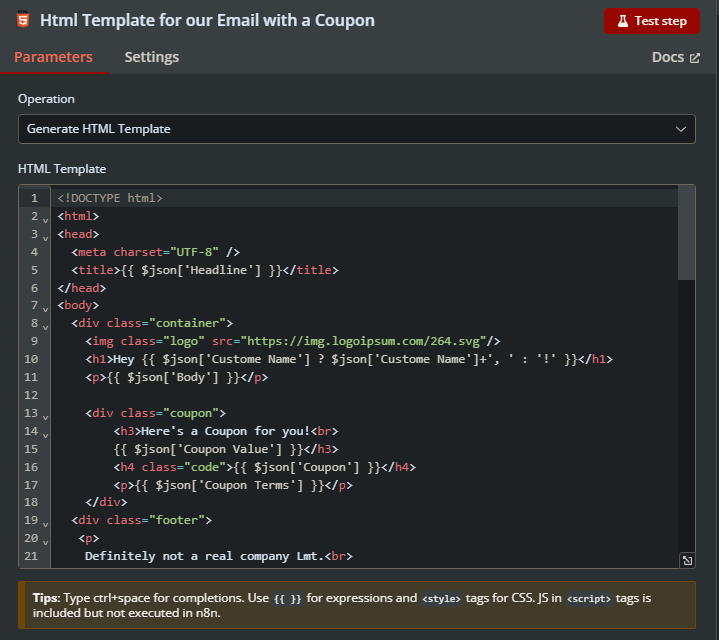
Node: HTML
Create two different HTML email templates, one with the coupon and one without.
Here's a simplified version of the template without a coupon:
<!DOCTYPE html>
<html>
<head>
  <meta charset="UTF-8">
  <title>{{ $json['Headline'] }}</title>
</head>
<body>
  <div class="container">
    <h1>Hey {{ $json['Customer Name'] ? $json['Customer Name']+', ' : '!' }}</h1>
    <p>{{ $json['Body'] }}</p>
  </div>
</body>
</html>
When a coupon is needed, the email will include it in a specific section.
Step 7: Send the Email
Node: Email Send
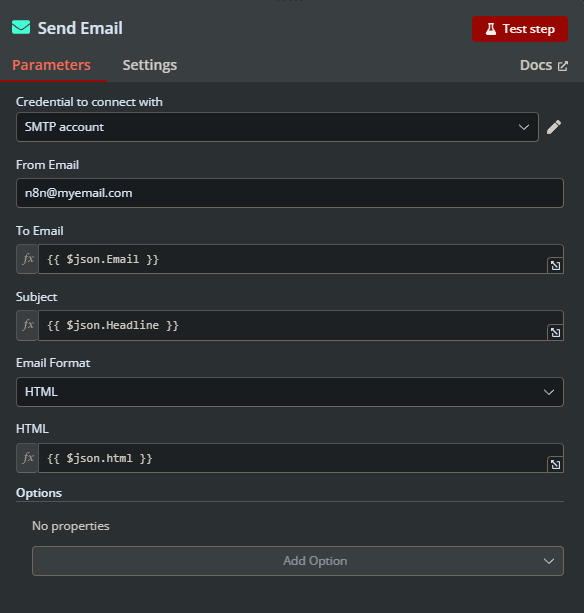
Finally, send the email using the email sending node in n8n. You should ideally use your dedicated newsletter tool to manage opt-outs and other related features.
Note: While sending emails directly via SMTP is possible, using a specialized email tool might be better for tracking and managing your emails.
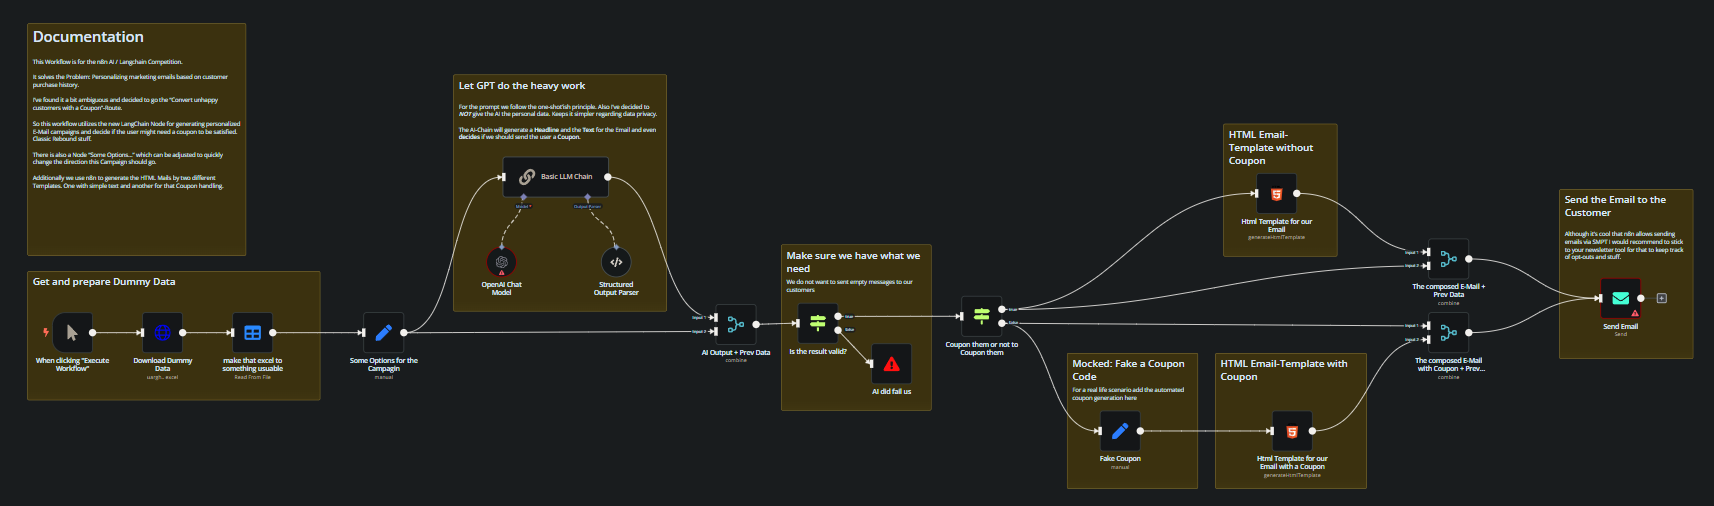
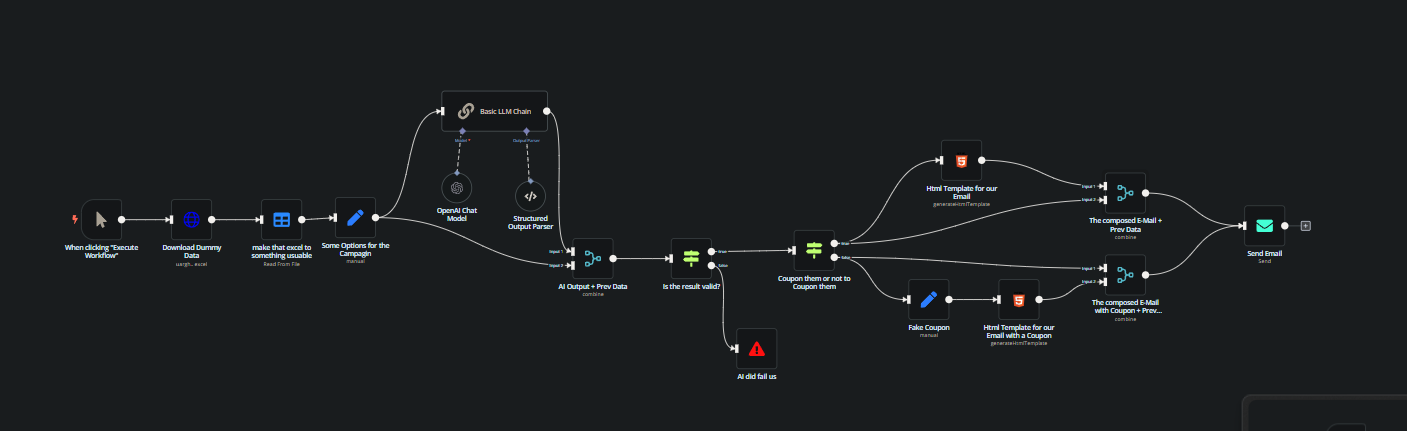
Final Workflow
Here's how the final workflow looks:
Conclusion
That's it! Your automated workflow for personalizing marketing emails based on customer purchase history is now ready. This workflow not only generates personalized emails but also decides if an unhappy customer should receive a coupon to boost satisfaction.
For more details or help with complex automation, feel free to contact me via email or check out my Upwork profile.
Happy automating! 🚀
For more information on n8n, visit their official website.


