Creating a Workflow to Handle Google Form Submissions using Make.com
In this tutorial, we'll create a scenario using Make.com to collect Google Form submissions, analyze them for negative reviews and special discount requests, and send emails accordingly. Before we dive into the tutorial, make sure you have an account on Make.com.
Step 1: Create a Google Form
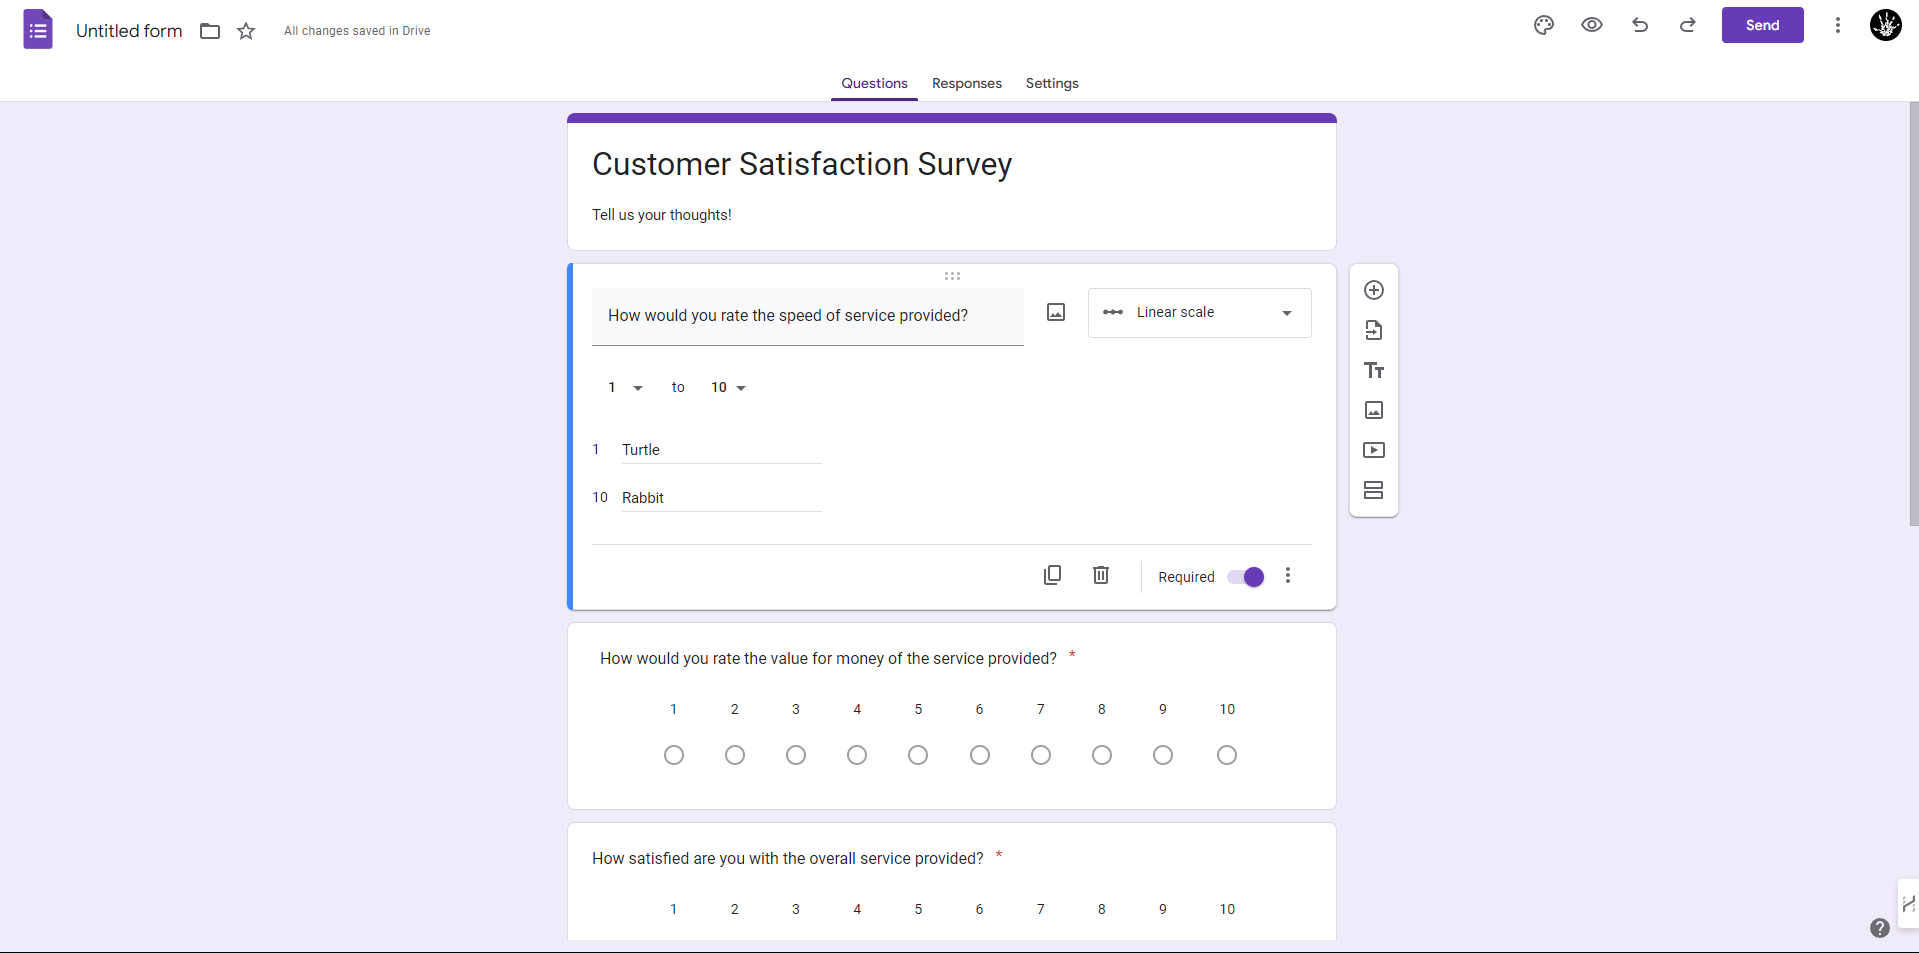
First, we need a Google Form to collect responses. Here’s a simple form setup you can follow:
- Question 1: "How would you rate the speed of service provided?" (Linear scale, 1 to 5)
- Question 2: "How would you rate the value for money of the service provided?" (Linear scale, 1 to 5)
- Question 3: "How satisfied are you with the overall service provided?" (Linear scale, 1 to 5)
- Question 4: "Comments/Concerns" (Paragraph text)
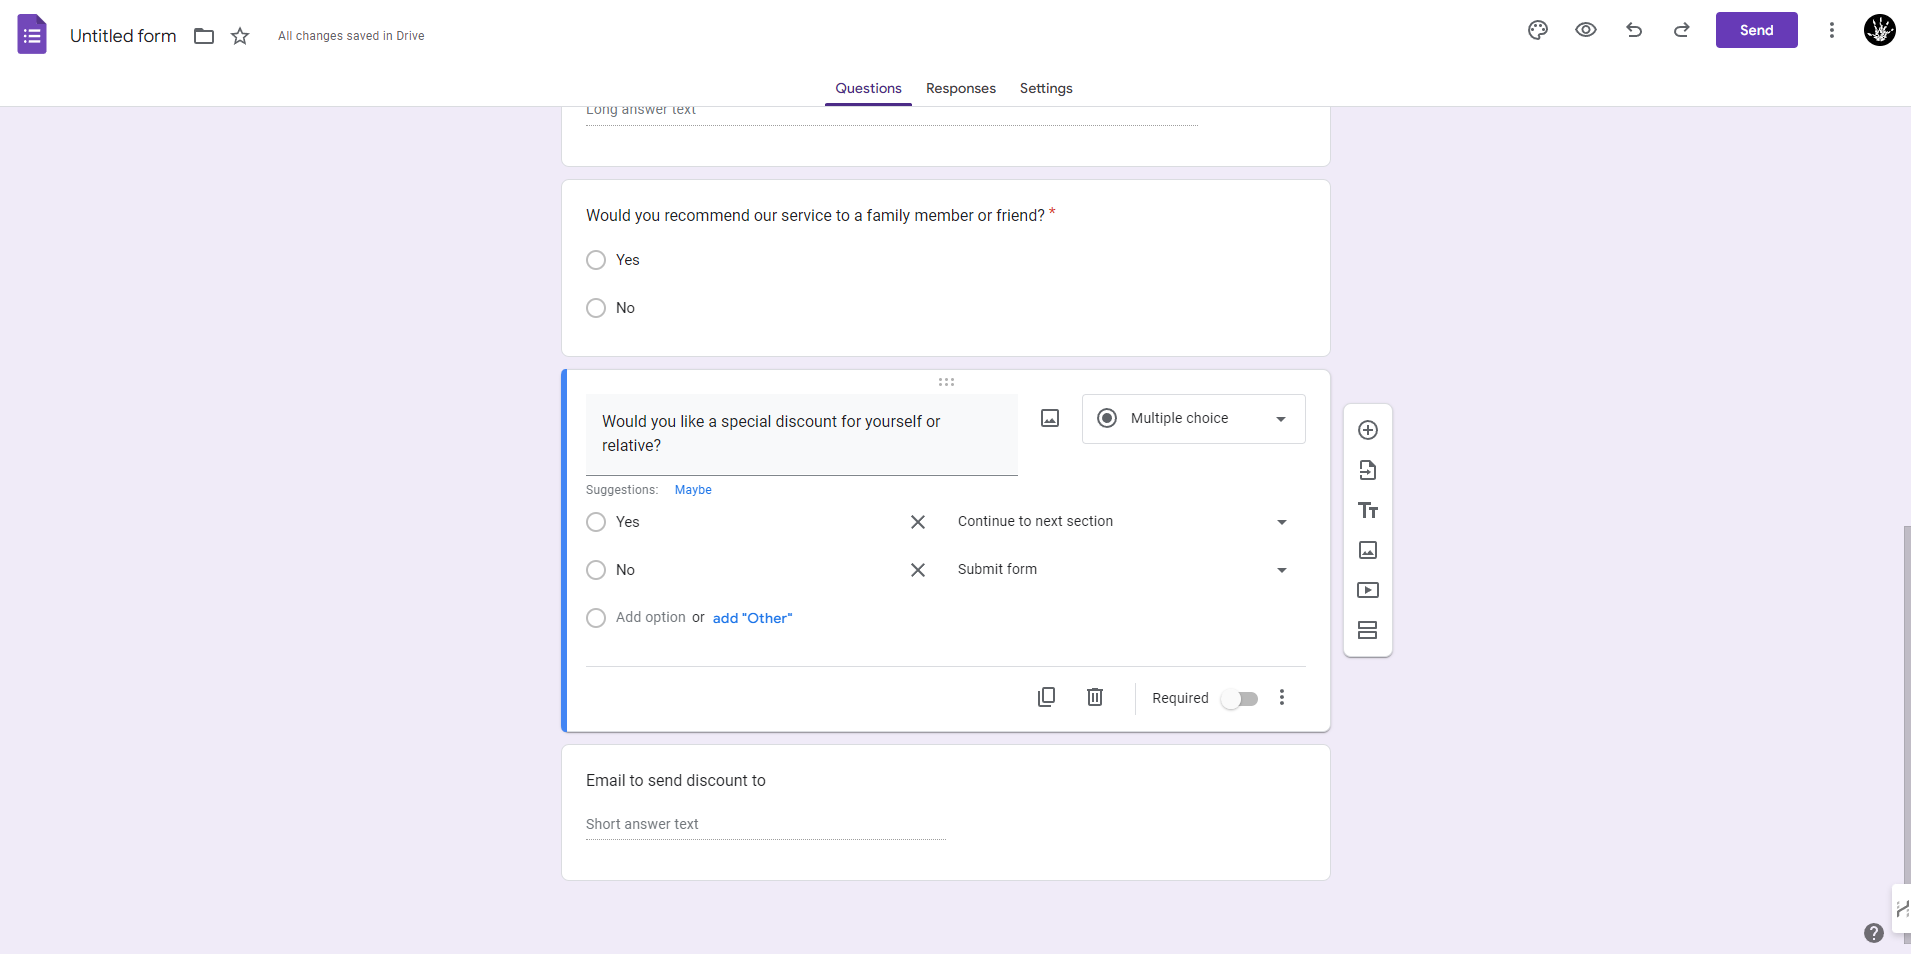
- Question 5: "Would you recommend our service to a family member or friend?" (Yes/No)
- Question 6: "Would you like a special discount for yourself or relative?" (Yes/No)
- Question 7: "Email to send discount to" (Short answer)
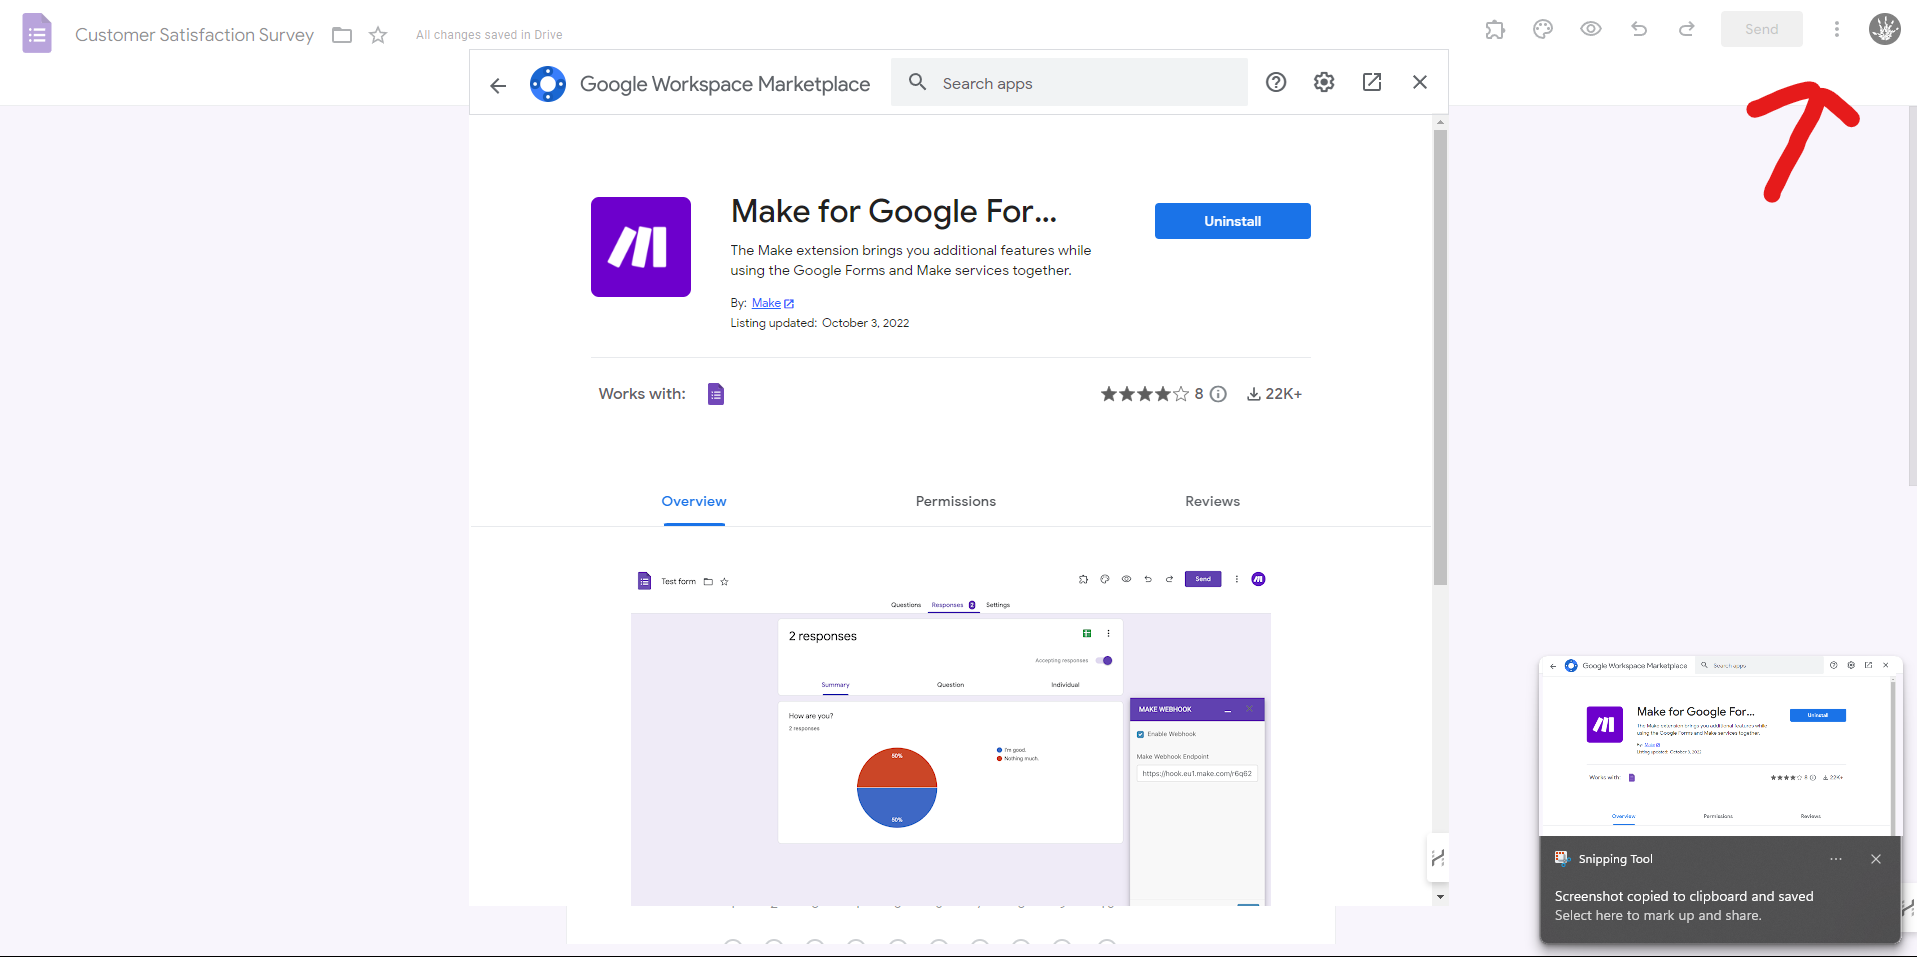
Step 2: Adding the Make.com Extension to Google Forms
To integrate your Google Forms with Make.com, you need to add the Make.com extension. Follow these steps:
- Go to Google Forms: Open your Google Form in edit mode.
- Add-ons: Click on the three vertical dots (⋮) on the top-right corner and select "Add-ons".
- Search and Install: Type "Make" in the search bar, locate the Make.com add-on, and install it.
- Authorization: Allow the necessary permissions for Make.com to access your Google Forms.
Now that the extension is set up, you're ready to create your scenario in Make.com.
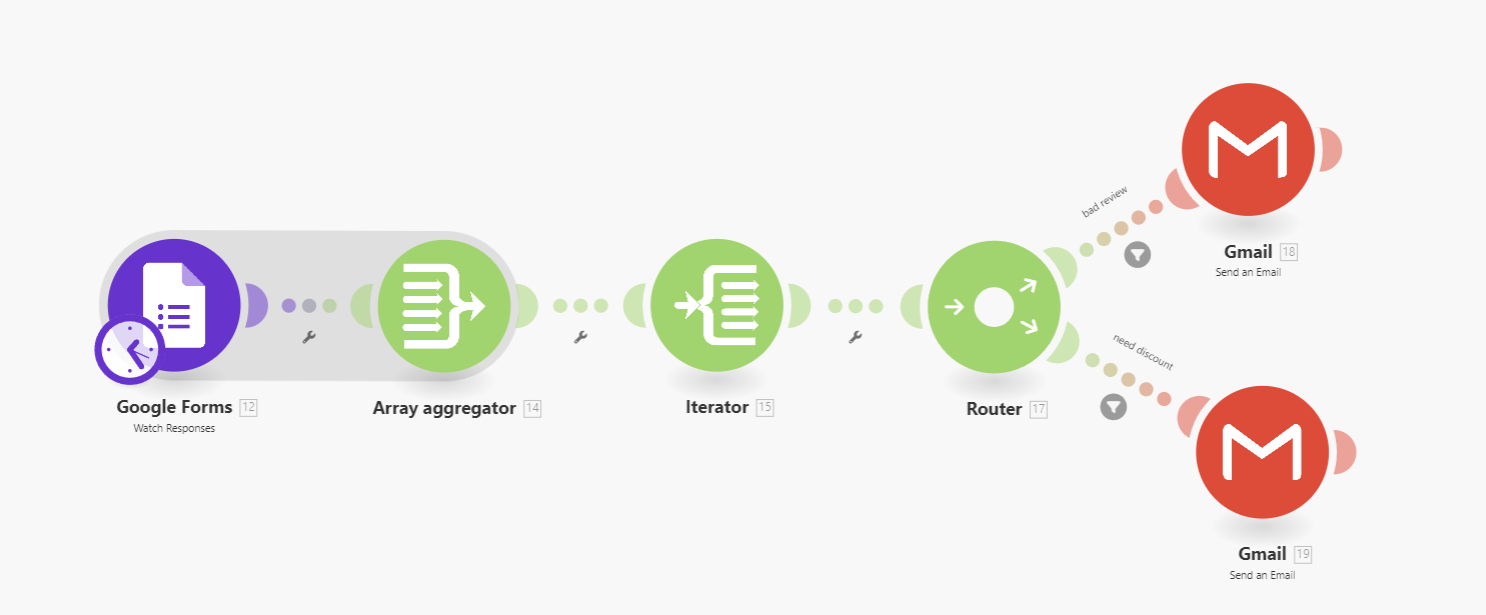
Step 3: Setting Up the Scenario in Make.com
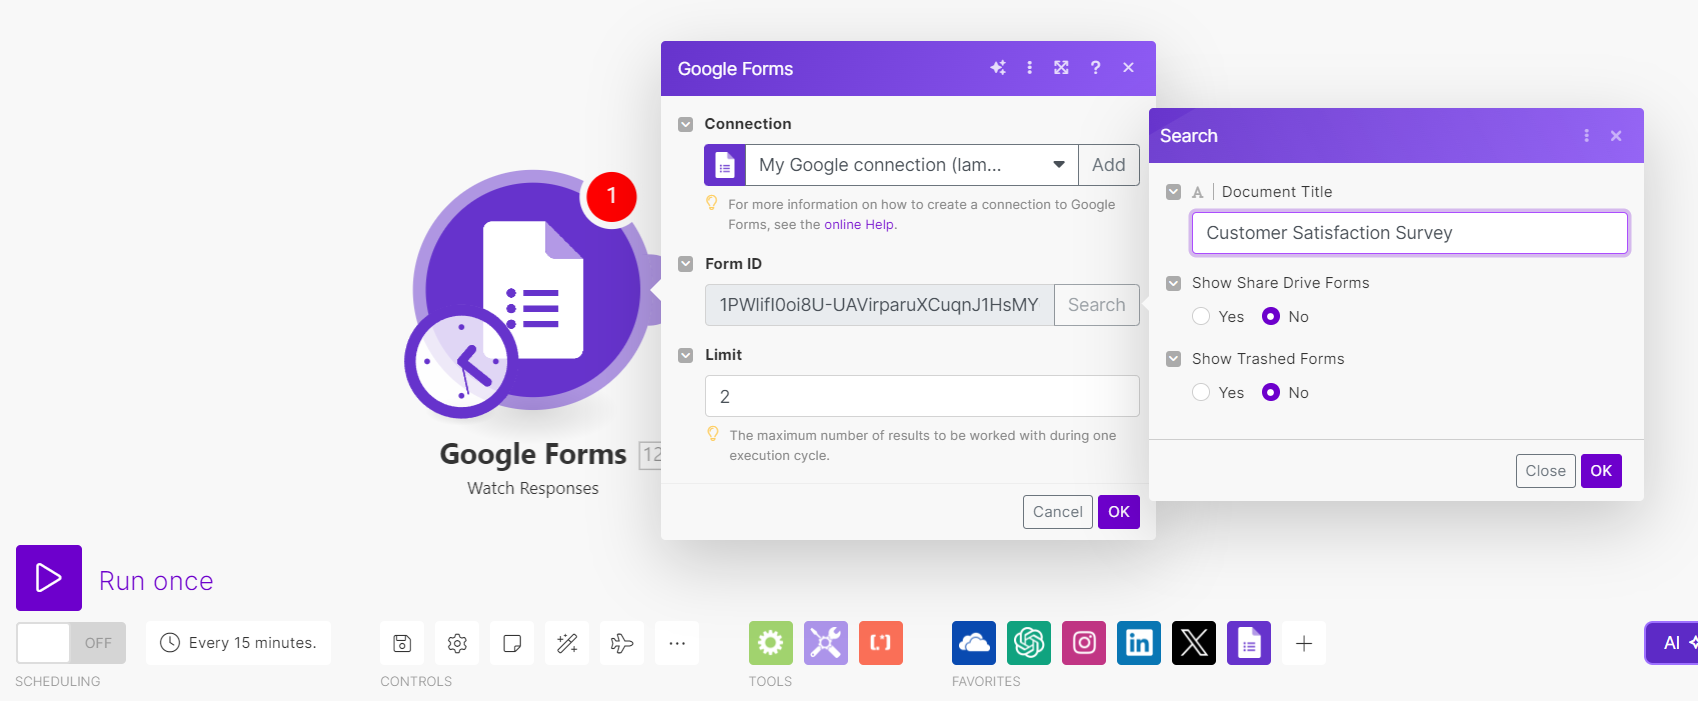
- Watch for New Responses in Google Forms:
- Add a Google Forms > Watch Responses module.
- Authenticate your Google account.
- Paste your Google Form ID in the Form ID field or search if you didn't grab the form ID.
- Set the limit to however many responses you want to fetch at once (e.g., 100).
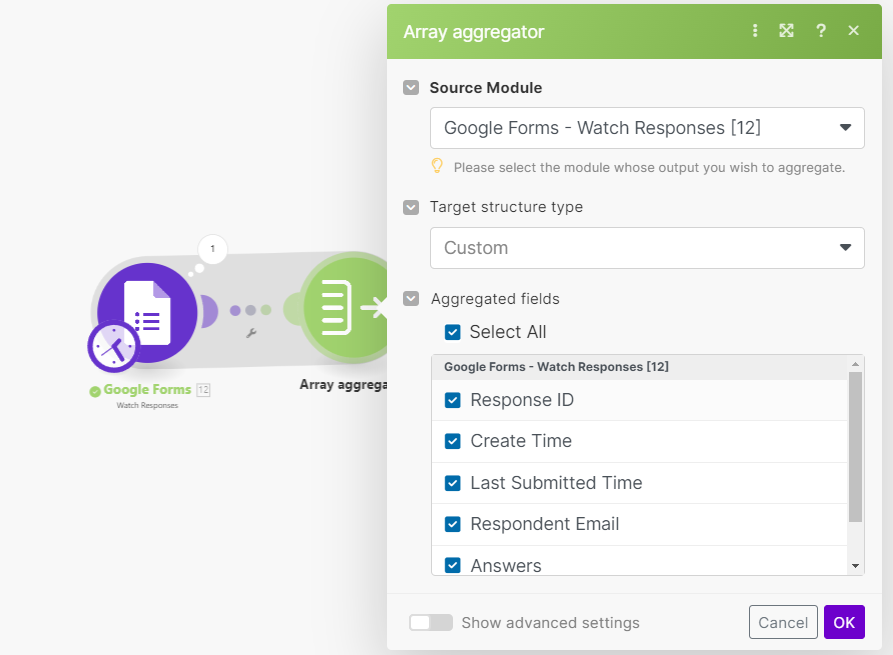
- Aggregate Responses:
- Add a Basic Aggregator module.
- Connect the Watch Responses module to the Aggregator.
- Map the relevant fields:
answers:{{12.answers}}respondentEmail:{{12.respondentEmail}}
- Iterate Over Aggregated Responses:
- Add a Iterator module.
- Connect the Aggregator to the Feeder.
- Map the field
arrayto{{14.array}}.
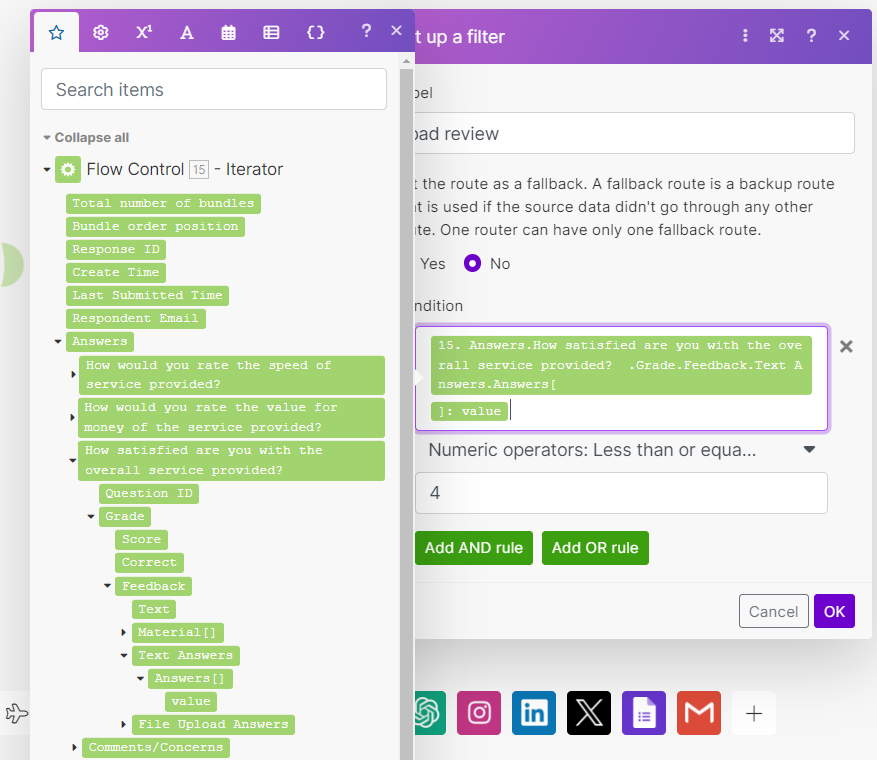
- Route and Handle Responses: Branch 1: Handle Bad Reviews; Branch 2: Send Discount Code:
- Add a Basic Router module.
- Connect the Feeder to the Router.
- Add a Gmail > Send an Email module.
- Set up a filter with:
- Field:
{{15.answers.grade.feedback.textAnswers.answers[].value}} - Condition: less or equal to 4 (indicating a bad review)
- Field:
- Map the email fields:
- To: your email address or [email protected]
- Subject: "Bad Review"
- Content:
Please check in on this review: {{15.answers}}, from {{15.respondentEmail}}

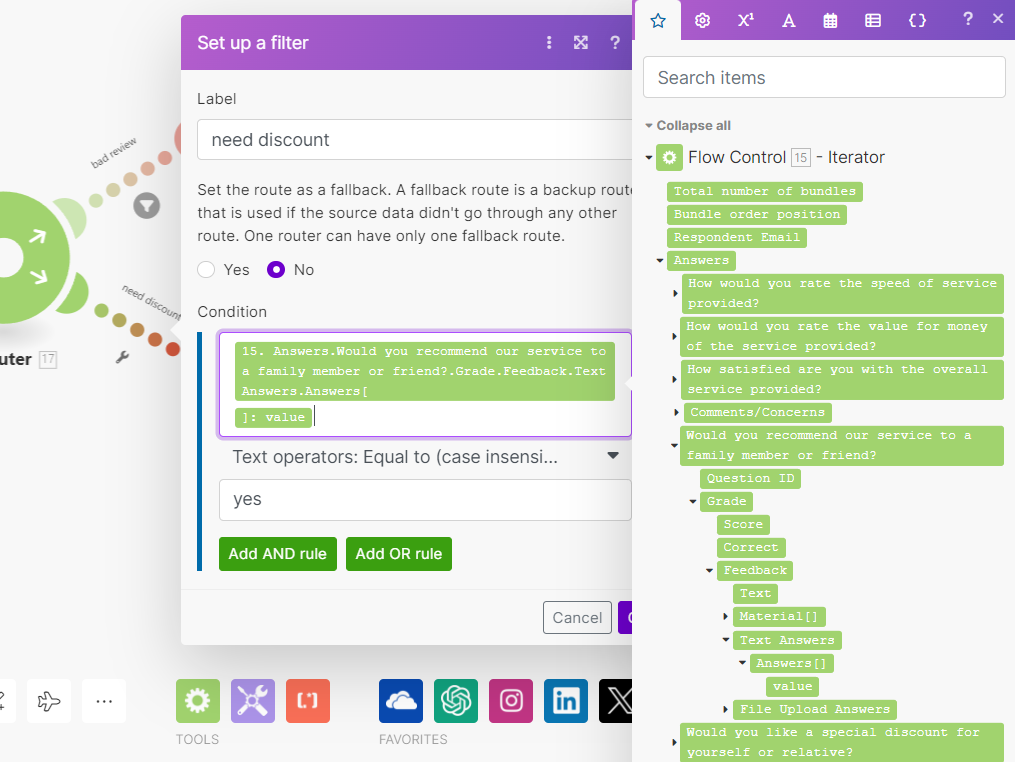
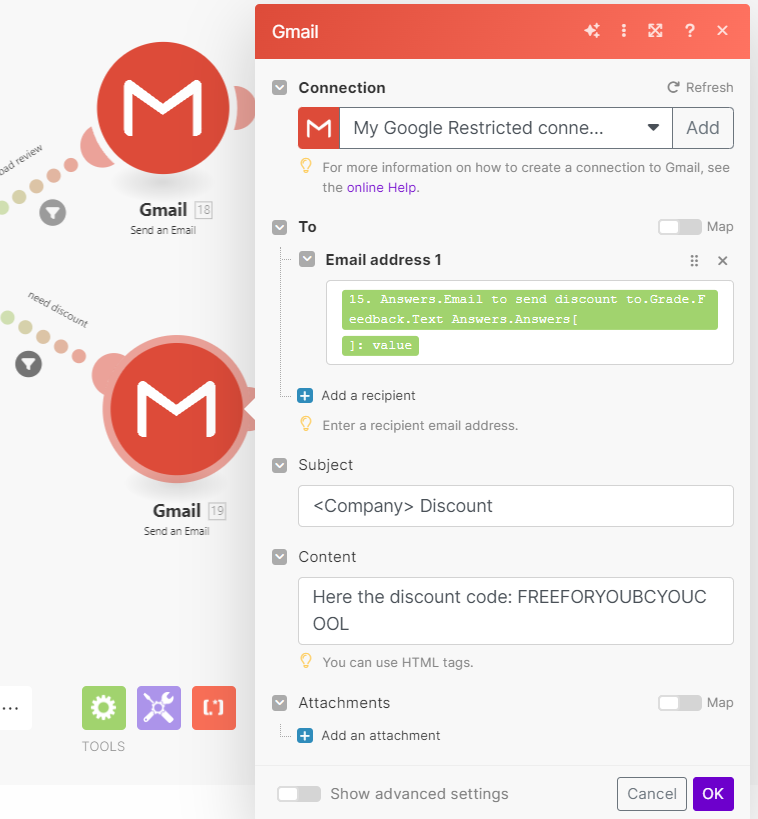
- Add another Gmail > Send an Email module.
- Set up a filter with:
- Field:
{{15.answers.grade.feedback.textAnswers.answers[].value}} - Condition: equal to "yes"
- Field:
- Map the email fields:
- To:
{{15.answers.grade.feedback.textAnswers.answers[].value}} - Subject: "Special Discount for You"
- Content: "Here is your discount code: FREEFORYOUBCYOUCOOL"
- To:
Step 4: Test Your Scenario
Make sure to test the scenario using test responses to confirm everything is working as expected. Check your inbox for any triggered emails.
Conclusion
You've now created a Make.com scenario to handle responses from a Google Form, analyze them for bad reviews and special discount requests, and send emails accordingly. Feel free to tweak the filters and email content as per your needs.
For more help or custom scenarios, reach out to us via email at or hire us on Upwork.
Happy automating! 🚀


